APT Assessment: What Coaches Miss
Anterior pelvic tilt is not caused by tight hip flexors. The assessment-first approach changes the diagnosis and the fix. Here is what the data shows.
The hip flexor myth
Open any fitness textbook, any coaching course manual, any Instagram post about anterior pelvic tilt, and you will find the same story: tight hip flexors pull the pelvis forward, weak glutes let it happen, and the fix is stretching the front and strengthening the back.
This explanation is so widely accepted that questioning it feels like questioning gravity. But it is wrong — or at best, catastrophically incomplete.
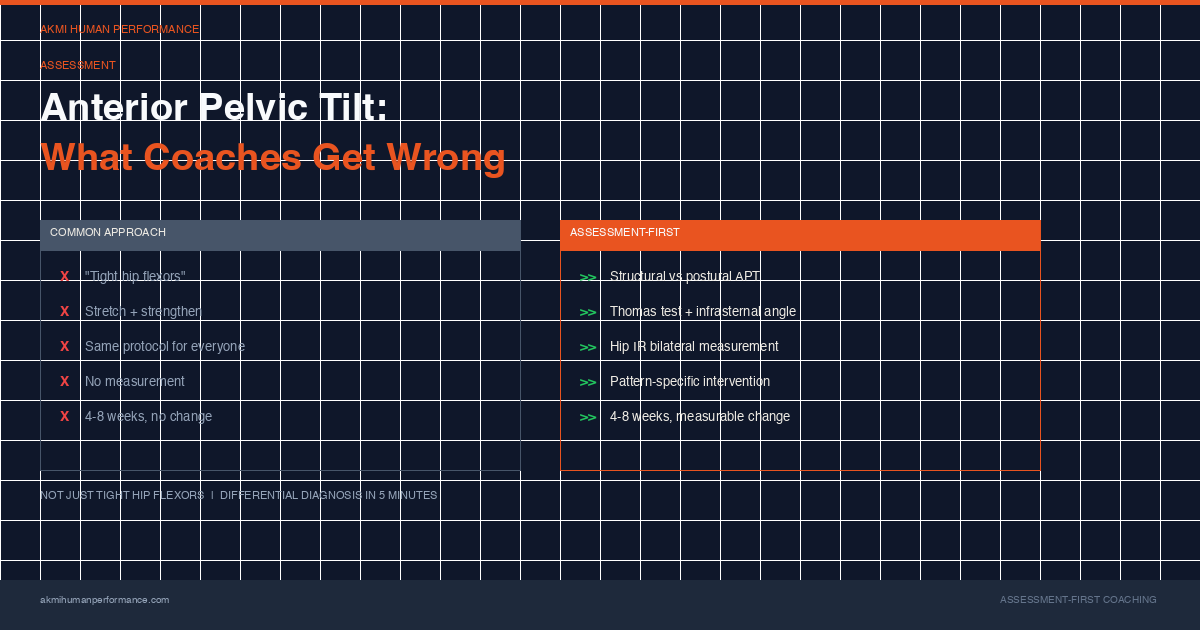
Here is what actually happens when a coach applies the “tight hip flexors” narrative to every client with APT:
- They prescribe hip flexor stretches to people whose hip flexors are not short
- They prescribe glute activation drills to people whose glutes are already working (just not in the plane that matters)
- They ignore the ribcage position, which is often driving the pelvic position
- They treat a structural pattern as a muscular problem
- The client does the stretches, the APT does not change, and everyone concludes that “posture correction doesn’t work”
Posture correction works fine. But you have to diagnose the right problem first.
Structural APT vs. postural APT: two different problems
The first thing a coach needs to understand about anterior pelvic tilt is that there are at least two distinct mechanisms, and the intervention for each is completely different.
Postural APT (compensation-driven)
This is the textbook version. The client spends hours sitting with their pelvis tucked under (posterior tilt). When they stand up, the hip flexors — particularly the iliacus and psoas — are in a shortened position from prolonged flexion. The pelvis tips forward because the hip flexors are pulling it there, and the lumbar extensors are co-contracting to maintain upright posture against the pull.
Postural APT is relatively common in sedentary populations, tends to be mild (5-10 degrees beyond neutral), and responds to the standard approach: hip flexor mobility work, glute and abdominal strengthening, and postural awareness cues.
But here is the catch: postural APT accounts for maybe 30-40% of the APT cases a coach sees. The rest are something else.
Structural APT (extension-pattern driven)
Structural APT is driven from above, not below. The ribcage flares anteriorly, the diaphragm loses its zone of apposition, and the pelvis follows the ribcage into extension. The hip flexors may or may not be short — in many cases, they are actually at normal length. The problem is not that the hip flexors are pulling the pelvis forward. The problem is that the entire system — ribcage, diaphragm, abdominal wall, pelvis — is locked in an extended position.
Think about it mechanically. The pelvis is a bone. It does not move itself. It is moved by the structures attached to it: the abdominals pull it into posterior tilt, the hip flexors and erectors pull it into anterior tilt, and the diaphragm and obliques control ribcage position, which indirectly controls pelvic position through the fascial and muscular connections between the two.
When the ribcage is flared and the diaphragm is flat (lost its dome shape), the abdominals cannot generate posterior tilt force efficiently. The obliques are lengthened. The rectus abdominis is lengthened. The transversus abdominis has lost its optimal line of pull. The result looks like APT, but the driver is the ribcage and the diaphragm, not the hip flexors.
Stretching the hip flexors in this case does nothing. The hip flexors are not the problem. The client might even gain temporary relief because stretching feels good, but the tilt does not change because the structural driver has not been addressed.
How to tell the difference
This is where assessment becomes non-negotiable. You cannot determine the mechanism by looking at the client from the side and drawing lines on a photograph. You need data.
Test 1: Modified Thomas test
Position the client supine at the edge of a table, both knees hugged to chest. Then lower one leg toward the table while maintaining the opposite knee-to-chest position.
- If the lowered thigh drops below horizontal (hip extension beyond neutral) and the knee extends past 80 degrees: the hip flexors (iliopsoas and rectus femoris) are not restricting range. This is not a “tight hip flexor” problem.
- If the thigh stays above horizontal: the hip flexors are genuinely restricting extension. This is postural APT territory.
Test 2: Infrasternal angle measurement
Stand behind the client and observe the angle formed by the lower ribs as they meet the sternum. Measure with a goniometer or estimate visually.
- Narrow angle (less than 80 degrees): The ribcage is not flared. APT is likely driven from below (hip flexors, lumbar extensors).
- Wide angle (greater than 100 degrees): The ribcage is flared. APT is likely driven from above (extension pattern). The ribcage needs to come down before the pelvis can follow.
Test 3: Hip internal rotation (bilateral)
This is the structural confirmation test. Measure seated hip IR on both sides.
- Bilateral restriction (both sides below 25 degrees): Extension pattern confirmed. The pelvis is locked in anterior tilt, both hips have lost IR, and the system is globally extended.
- Asymmetric restriction (one side significantly lower): Lateralized pattern. The APT may be part of a larger rotational compensation, not a simple sagittal plane problem.
- Normal bilateral IR (both sides 35+ degrees): The pelvis has available motion. The APT is more likely postural and should respond to standard interventions.
Test 4: Active straight leg raise
Supine client raises one straight leg toward the ceiling. Observe what happens at the opposite leg and the lumbar spine.
- If the opposite leg lifts off the table or the lumbar spine extends further: The system cannot disassociate hip flexion from lumbar extension. This is an extension pattern sign.
- If the opposite leg stays flat and the lumbar spine stays neutral: The system can disassociate. More likely a local hip flexor issue.
These four tests take about 5 minutes. They give you a differential diagnosis that changes the entire intervention.
The cost of wrong diagnosis
When a coach treats structural APT with the postural APT playbook, several things happen:
The stretches don’t transfer. The client stretches their hip flexors daily. The Thomas test may even improve (they gain more passive hip extension). But standing pelvic position does not change because the ribcage is still driving the pattern. The client stretches more aggressively. Still no change. Frustration builds.
The strengthening targets the wrong plane. “Activate your glutes” in a bridge or hip thrust addresses the sagittal plane. But structural APT is often paired with a rotational pattern — the pelvis is anteriorly tilted AND rotated. The glutes need to work in the transverse plane (external rotation, lateral stability), not just the sagittal plane (extension). A client doing 3 sets of glute bridges every session may have perfectly “activated” glutes that are not solving the actual positional problem.
The client develops a dead-end pattern. They become the client who “knows” they have APT, has been doing corrective work for two years, and nothing has changed. They have spent hundreds of hours on exercises that feel productive but address the wrong driver. When they finally encounter an assessment-first coach who identifies the ribcage as the driver, they realize the clock was running on the wrong race.
Injury risk persists. If the APT is structural and the lumbar spine is locked in extension, the facet joints are compressed and the posterior disc wall is under tension. No amount of hip flexor stretching changes this. The client continues training under extension loading, and eventually something gives — usually the lower back, sometimes the hip.
The assessment-first intervention
Once you have differentiated structural from postural APT, the intervention becomes specific.
For postural APT (hip flexor driven)
The standard approach works here, with some refinements:
- Hip flexor mobility: Half-kneeling hip flexor stretch with posterior pelvic tilt. The tilt is the key — without it, the stretch just extends the lumbar spine.
- Glute strengthening in hip extension: Hip thrusts, bridges, pull-throughs. Standard sagittal plane work.
- Core anti-extension work: Dead bugs, pallof presses, rollouts. Teach the system to resist extension, not just create flexion.
- Postural cues: These actually work for postural APT because the structure can accommodate the change. Cue: “ribs down, belt buckle up.”
Timeline: 4-8 weeks for noticeable change in resting posture. 3-6 months for the new position to become automatic.
For structural APT (extension-pattern driven)
This requires a different sequence entirely:
-
Ribcage position first: Exhale-focused drills that restore the diaphragm’s zone of apposition. The client cannot achieve posterior pelvic tilt until the ribcage comes down. Hooklying breathing with full exhale, balloon blowing (forced exhale against resistance), and 90/90 hip lift with emphasis on exhale and abdominal wall engagement.
-
Oblique activation: The obliques are the muscles that pull the ribcage down. When the ribcage is flared, the obliques are lengthened and weak. Side-lying respiratory exercises, modified side planks with exhale emphasis, and oblique-focused anti-rotation work.
-
Hip internal rotation restoration: If bilateral IR is restricted, address it directly. Sidelying hip IR with adductor activation, 90/90 breathing with hip shift, and standing hip shift patterns. The hip IR does not come back by stretching external rotators — it comes back by repositioning the pelvis, which changes the femoral head orientation in the acetabulum.
-
Retest after 4 weeks: Measure infrasternal angle, hip IR, Thomas test, and active SLR again. If the ribcage has come down and hip IR has improved, the APT will have reduced without a single hip flexor stretch.
Timeline: 4-8 weeks for measurable structural change. 3-6 months for the pattern to stabilize under load.
Why the fitness industry gets this wrong
The postural APT narrative is simple, visual, and marketable. “Your hip flexors are tight because you sit all day. Here are three stretches to fix it.” It makes a great Instagram carousel. It makes a terrible clinical intervention.
The structural APT narrative is complex. It requires understanding respiratory mechanics, ribcage position, diaphragm function, and the relationship between the thorax and the pelvis. It does not fit in a 60-second reel. It requires assessment.
The fitness industry selects for simple narratives because simple narratives reach more people. But the clients who have been stretching their hip flexors for years with no change are the clients who need the complex, accurate answer. Those are also the clients who will pay for assessment-first coaching, stay longer, refer others, and build a coach’s reputation as someone who actually solves problems.
The APT assessment checklist
For coaches who want to start differentiating APT mechanisms tomorrow, here is the sequence:
- Visual observation: Standing lateral view. Confirm APT is present. Note infrasternal angle.
- Thomas test: Is hip extension restricted? (Postural APT indicator)
- Infrasternal angle: Is the ribcage flared? (Structural APT indicator)
- Hip IR bilateral: Are both sides restricted? (Extension pattern confirmation)
- Active SLR: Can the client dissociate hip flexion from lumbar extension? (Pattern stiffness indicator)
If tests 2 positive, tests 3-4 negative: postural APT. Standard intervention. If tests 3-4 positive, test 2 negative or equivocal: structural APT. Ribcage-first intervention. If all positive: mixed presentation. Start with ribcage, retest Thomas after 4 weeks.
The assessment takes 5 minutes. The data changes the intervention. The intervention changes the outcome.
Track it over time
Static assessment is useful. Longitudinal tracking is where the real value sits.
If you test APT-related markers at baseline and every 4-8 weeks, you build a trend line. You can see whether the intervention is working at the structural level, not just the performance level. A client’s squat may improve because they are getting stronger through compensation, not because their structure has changed. The ROM data catches this.
The AKMI ROM Estimator tracks hip IR, hip ER, Thomas test position, and 15 other ROM measurements over time. Enter measurements, get pattern probability, track the trend. Free, no account required.
If you want the full assessment methodology — 18 tests, 6 patterns, structural classification — read the complete biomechanical assessment guide.
Stop guessing why the tilt is there. Measure it, classify it, and treat the right driver. The AKMI assessment methodology gives you the framework. The ROM Estimator gives you the starting data.
Strategic consultant specializing in growth, profitability, and internationalization. Creator of the assessment-first coaching methodology used by AKMI Human Performance. Background in business strategy (MIT Sloan) and applied biomechanics with over 10 years of hands-on coaching experience.
View all articlesRelated Articles
View all ->Ankle Mobility for Deeper Squats: What You Are Actually Missing
Limited squat depth is blamed on tight ankles. The real limitation is usually the hip, the rib cage, or the way your nervous system organizes the squat pattern — not the ankle joint itself.
AssessmentBiomechanical Assessment vs FMS: What Is the Difference?
The Functional Movement Screen and a biomechanical assessment look similar from the outside. They are fundamentally different in what they measure, what they tell you, and what they miss.
AssessmentFix Bunions Without Surgery: A Structural Approach
Bunions are not a genetic foot deformity. They are a progressive structural failure driven by hip mechanics, arch collapse, and hallux compensation. Surgery addresses the result, not the cause.
AssessmentChin Tucks Will Not Fix Forward Head
Forward head posture is not a neck problem. It compensates for thoracic kyphosis and breathing dysfunction. Fix the cause, the head follows.